In 2022, we wrote about how to set up ecommerce purchase tracking in Shopify using additional checkout scripts.
Since then, Shopify has officially launched customer events web pixels, and deprecated the additional scripts field in August of this year. The additional scripts field will continue to function until August 28th 2025, but here at Wonder we have decided to move our scripts over to customer events now, so we don’t have to do them all next year at the last minute!
In this article we will revisit how to implement purchase event tracking in GA4 so you can easily migrate your additional scripts to web pixels.
How To Set Up Ecommerce Events With An App
If you are already using the Google & YouTube app for Shopify, you can easily connect it to your existing GA4 property by accessing the app and finding the settings for “Your Google Analytics property” and following the steps to connect it to your account.
To install and configure the Google & YouTube app follow these steps.
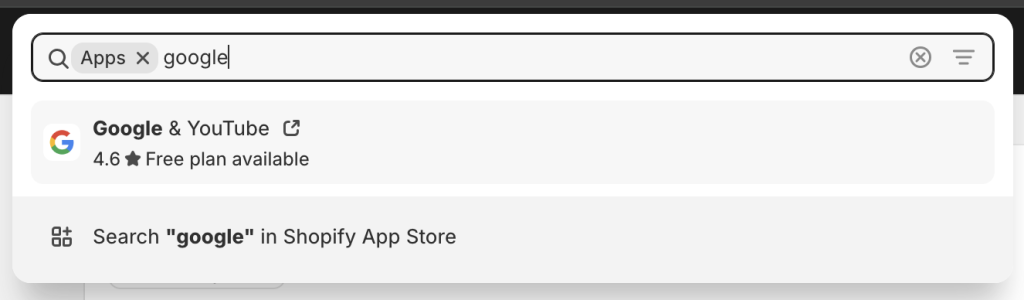
- Login to your Shopify store.
- Click on Apps in the left hand navigation.
- In the popup that appears, type “Google” and click the app option that appears.
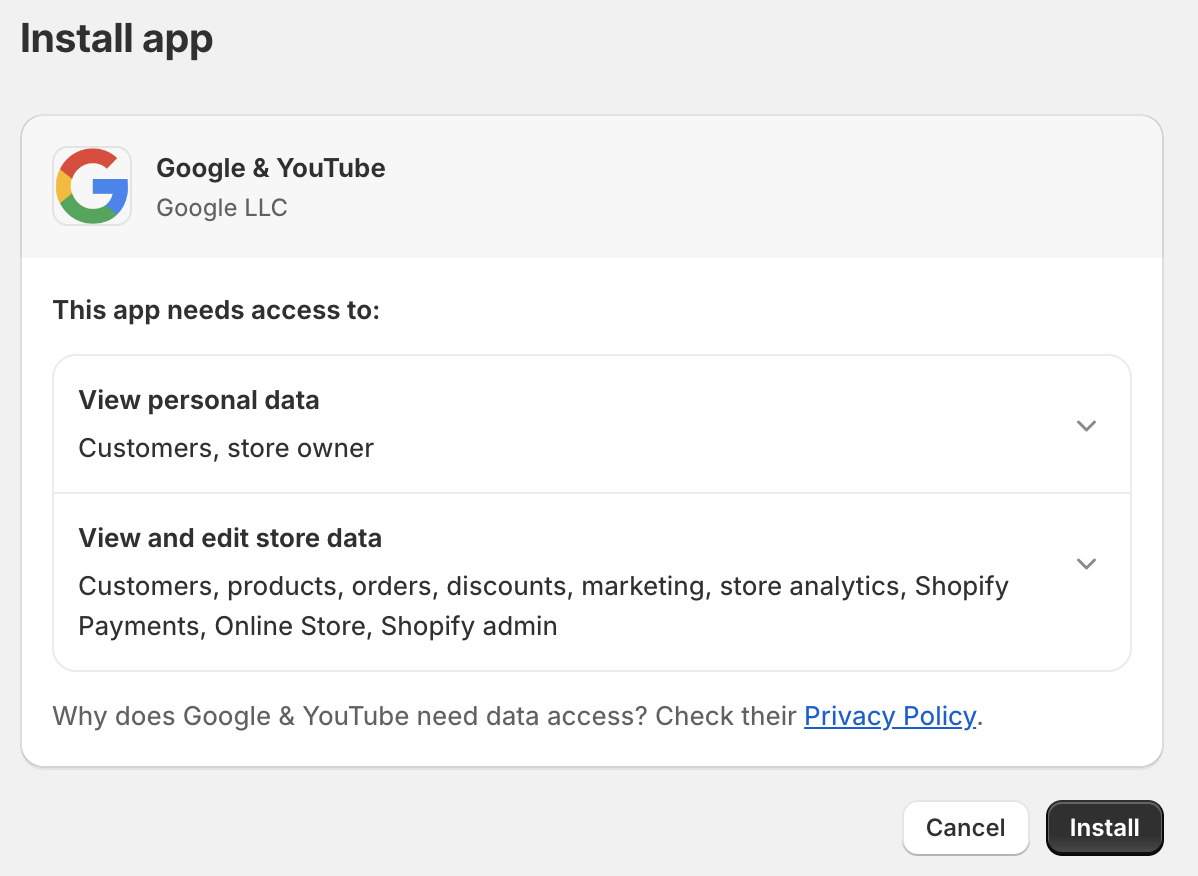
- This will open the Shopify App Store. On the page that appears, click the Install button.

- Click the Install button on the next page that appears.
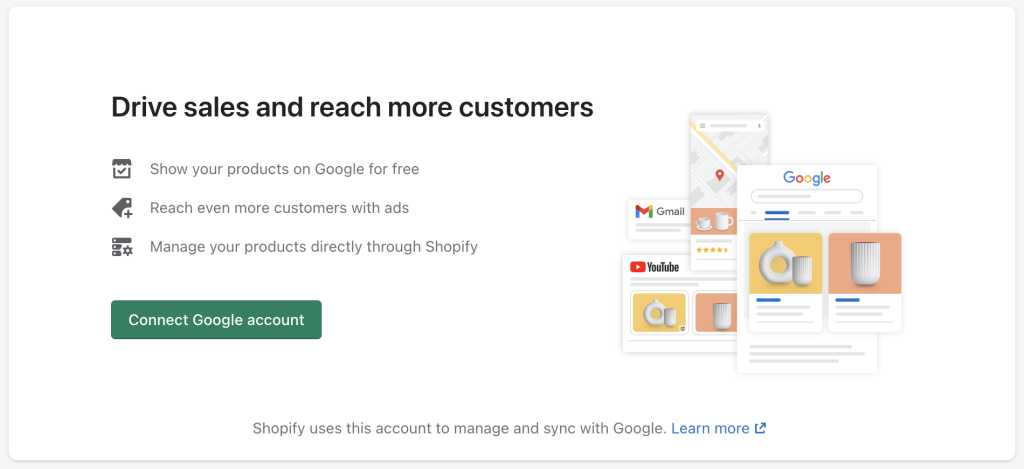
- Click on the Connect Google account button and follow the steps to connect your account to your website.
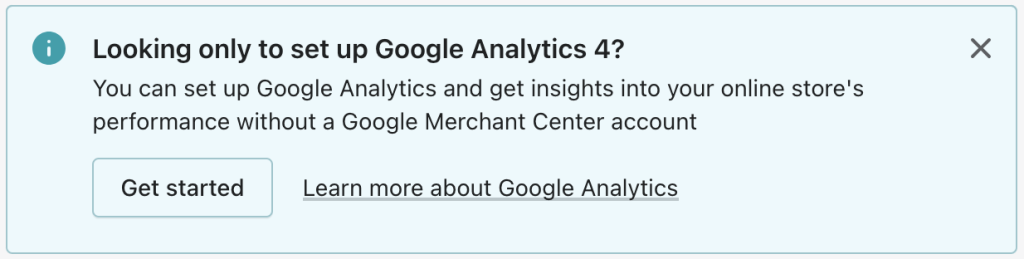
- Once you have connected your account, you can then complete the steps on the next page to connect the app to Google Ads and Merchant Centre if you require. If you don’t and only want to set up Google Analytics, click on the Get Started button on the GA4 information box.
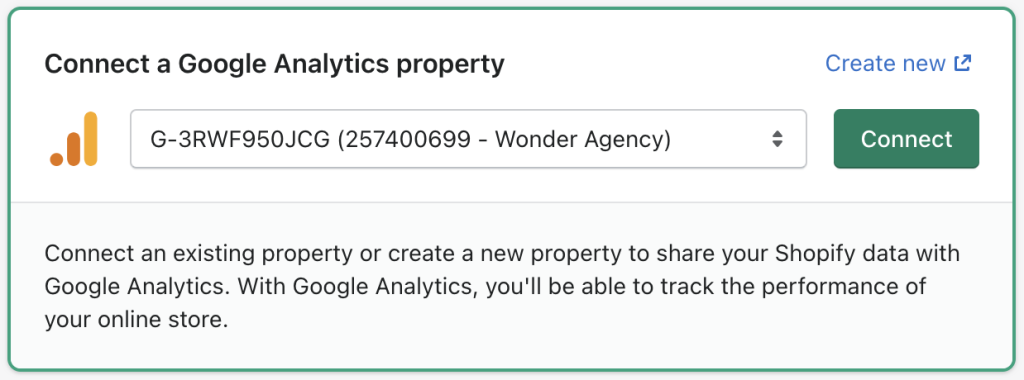
- You will be presented with a list of properties that you can connect to, or you can click the Create new link to go to Google Analytics to create a new property. After you have selected a property, click the Connect button and GA4 will be automatically added to your website and start tracking immediately.
The Google & YouTube app will automatically track the ecommerce purchase event but also events for page_view, search, view_item, add_to_cart, begin_checkout and add_payment_info.
How To Set Up The Ecommerce Purchase Event Without An App
Using the Google & YouTube app is an easy way to get GA4 onto your website and tracking ecommerce events. However, if you have already set up other ecommerce events such as view_item, add_to_cart or view_list_item, you might not want to install an app which duplicates this work and instead just create a customer event web pixel for the purchase event.
To create the web pixel, follow these steps.
- To get started, log in to your Shopify store’s admin panel. Navigate to Settings in the bottom left corner, then select Customer Events. Here you’ll find a list of all the pixels added to your store, including both custom pixels and those added by apps.
- Select the Add Custom Pixel button located at the top of the page.

- Enter a name for your pixel. In this example, we’ll use Google Analytics Purchase.
- You’ll see an empty Code field at first. This is where you’ll input the code to track purchases in Google Analytics.
- Find your Google tag and add it on line 2 of the Code field.
- On line 8, insert the following code. This code listens for the checkout_completed event, which triggers when a customer finalises their purchase. It captures and sends key data, including the transaction ID, order value, shipping and tax costs, along with a list of products and quantities purchased using the event data.
analytics.subscribe('checkout_completed', (event) => {
  const checkout = event.data.checkout;

  const transactionId = checkout.order.id;
  const transactionTotal = checkout.totalPrice.amount;
  const transactionShipping = checkout.shippingLine.price.amount;
  const transactionTax = checkout.totalTax.amount;
  const currency = checkout.currencyCode;

  var transactionProducts = [];
  var lineItems = checkout.lineItems;

  lineItems.forEach((lineItem) => {
    var product = {
      item_name: lineItem.title,
      item_id: lineItem.variant.sku,
      price: lineItem.variant.price.amount,
      quantity: lineItem.quantity,
      item_variant: lineItem.variant.title
    };
    transactionProducts.push(product);
  });

  dataLayer.push({
    event: ecommerce_data,
    ecommerce: {
      transaction_id: transactionId,
      value: transactionTotal,
      shipping: transactionShipping,
      tax: transactionTax,
      currency: currency,
      items: transactionProducts
    }
  });
});- Once you have added the code, click the Save button at the top of the page.
- After saving, click the Connect button located at the top or bottom of the page. Once connected, the pixel will be active on your store and will begin tracking immediately.
If you need to modify the pixel, simply update the code and click Save to apply the changes immediately.
To disable the pixel, click the Disconnect button, and it will be removed from your store.
And that’s it! Two solutions to adding purchase events to your Shopify website. If you need any help with your advertising, tracking and analytics requirements or want to discuss how you can get the most out of your data then get in touch – we’d love to hear from you.