Earlier this year, German courts ruled that using Google Fonts was in breach of GDPR. This article isn’t about that, there have been plenty of articles about that already. This article is about the changes we’ve made at Wonder to ensure that we don’t make the same mistakes and how you can implement them too.
Downloading Fonts from Google Fonts
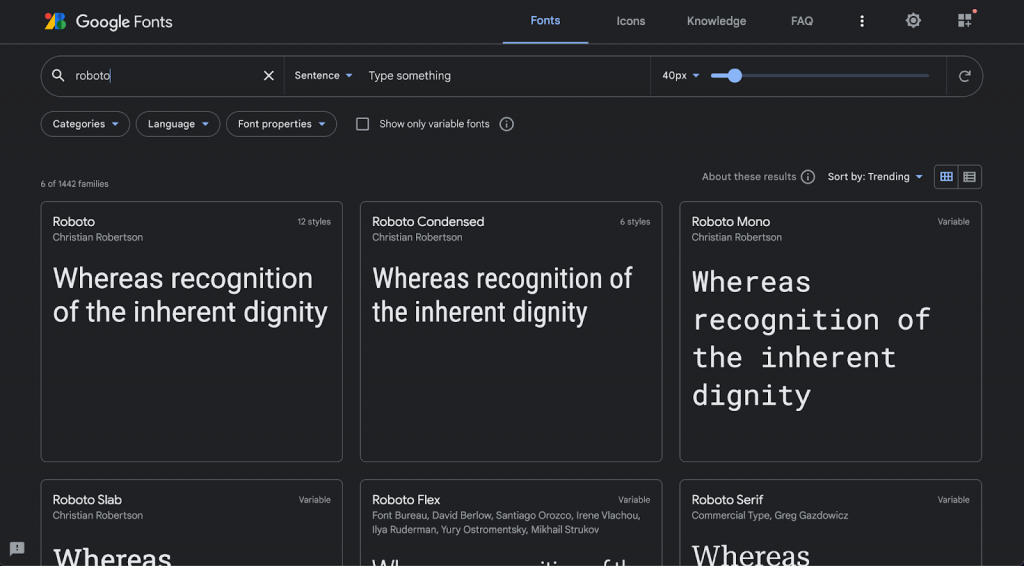
- Start by going to https://fonts.google.com/

- Search for the font you are using. In this example, I am going to be using Roboto.

- After finding the font you want, click on it and you will be taken to the font’s page.

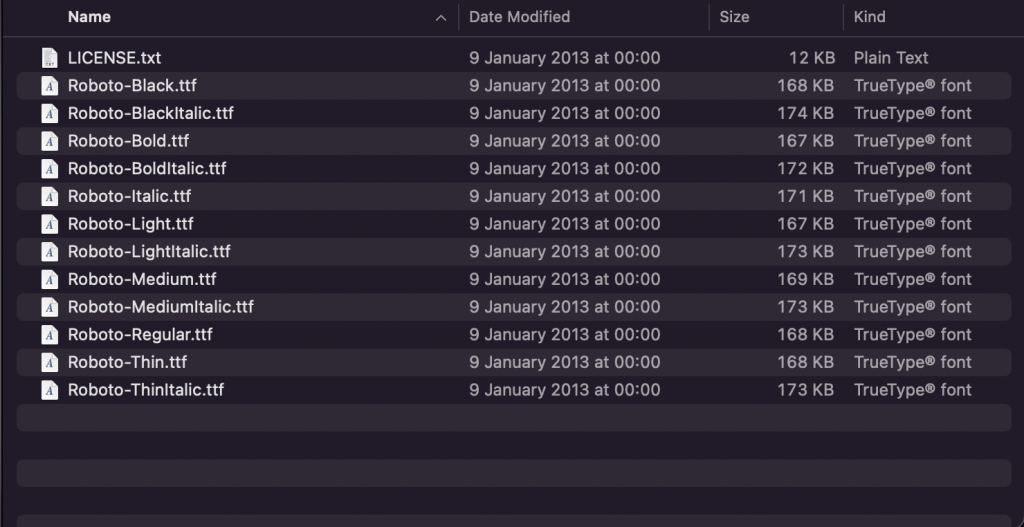
- Click on the Download family button at the top right of the page to download all the font weights and styles, and if available also a variable font file.

- The font files downloaded are TrueType (.ttf), which while being well supported by browsers, aren’t the best for performance. So next we will convert the fonts.
Converting Fonts to WOFF2
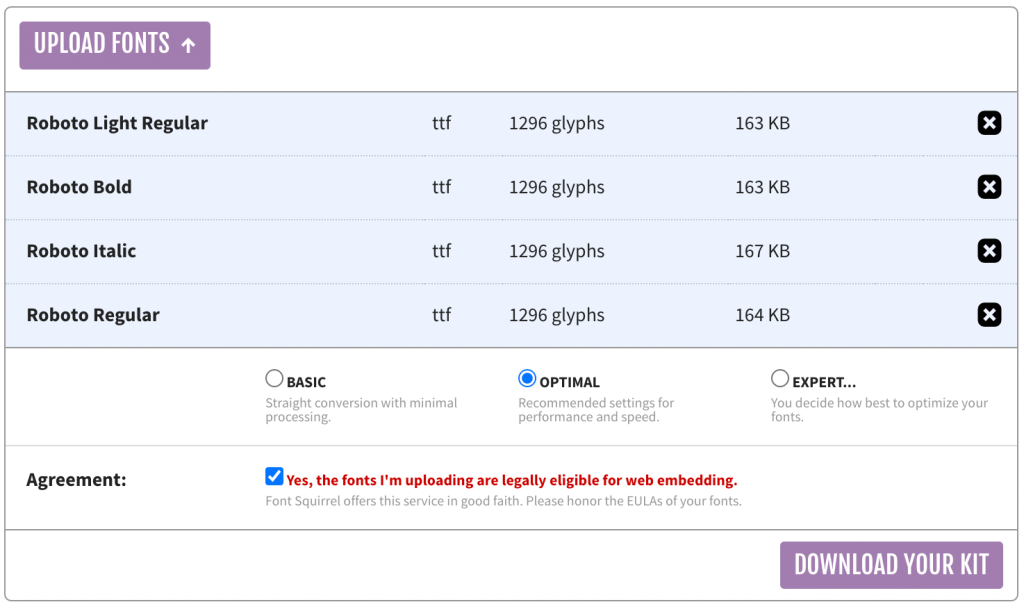
- If you want to support variable fonts on your website, use the variable font files that you have downloaded. If not, pick the weights and styles you need from either the static folder on a variable font or root folder if not. In my example, I am going to use the following font weights and styles from the static folder.
- Light
- Regular
- Italic
- Bold

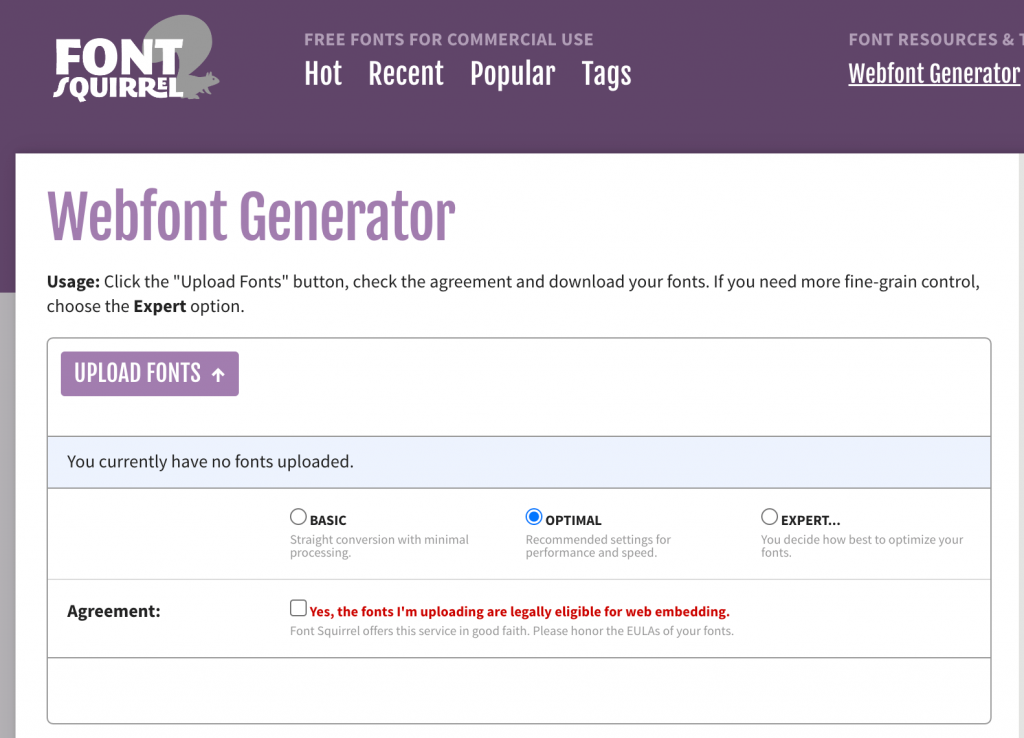
- Go to the Font Squirrel Webfont Generator: https://www.fontsquirrel.com/tools/webfont-generator

- Select the fonts you want to upload.

- After uploading the fonts and choosing your conversion type (I just used optimal as it is the default) and check the checkbox to agree that I am legally eligible to embed these fonts on the web, click the Download Your Kit button.

- This will download a zip folder containing your converted fonts and some demo HTML and CSS files to show you the font in action. The fonts you receive will be in the Web Open Font Format (.woff) and Web Open Font Format 2 (.woff2) formats. The stylesheet.css file will also contain the CSS code we will need later.
Putting the fonts on your website
- Once you have downloaded the font files, you just need to add them to your website. This involves uploading the fonts themselves to the website server, and also adding some CSS to be able to use them. Personally, I use both the woff2 and woff files, as this gives me the most browser compatibility coverage, but if you want you can just include the woff2 format, as this is the best optimised version for the web.
- Upload the font files to your server. It doesn’t matter where this is, as long as you can access the file in your browser. If you aren’t sure what you are doing here, I’d recommend getting your website developer to help you, as they might be able to recommend the best place to upload the files.
- Once you have uploaded the files, you need to edit your CSS file to include calls to the font files. This will look something like this:
@font-face {
    font-family: 'Roboto';
    src:
         local(‘Roboto’),
         url('roboto-light-webfont.woff2') format('woff2'),
         url('roboto-light-webfont.woff') format('woff');
    font-weight: 300;
    font-style: normal;
    font-display: swap;
}

@font-face {
    font-family: 'Roboto';
    src:
         local(‘Roboto’),
         url('roboto-bold-webfont.woff2') format('woff2'),
         url('roboto-bold-webfont.woff') format('woff');
    font-weight: 700;
    font-style: normal;
    font-display: swap;
}

@font-face {
    font-family: 'Roboto';
    src:
         local(‘Roboto’),
         url('roboto-italic-webfont.woff2') format('woff2'),
         url('roboto-italic-webfont.woff') format('woff');
    font-weight: normal;
    font-style: italic;
    font-display: swap;
}

@font-face {
    font-family: 'Roboto';
    src:
         local(‘Roboto’),
         url('roboto-regular-webfont.woff2') format('woff2'),
         url('roboto-regular-webfont.woff') format('woff');
    font-weight: normal;
    font-style: normal;
    font-display: swap;
}
- You may have noticed that I’ve edited the code that you’ll receive from Font Squirrel within the stylesheet.css file. This is because I have optimised it further. However, if you don’t want to do this, feel free to use the file as it is – just make sure the code is at the top of your main CSS file.
- The changes I have made are:
- Changed the font family to be consistent with each other, and edited the font-weight and font-style properties to be the actual values they should be. I.e. The bold font should have a weight of 700.
- I’ve added the line local(‘Roboto’) before the call to the woff2 file. This is placed here in the off chance that the user has this particular font installed on their computer, removing the need for the font to be downloaded and actually speeding up the website.
- I’ve added the line font-display: swap at the end of each declaration, so a system font will appear before switching the font once it’s been downloaded.
Now all you have to do is remove the old Google Fonts code from your website. Your users should see no difference, as they are still seeing the same font (unless you have changed font during this process), but you can now rest easy knowing that you aren’t sending user’s IP data to Google without their consent.
Hopefully the information we’ve provided will help you to avoid making the same mistake that others have regarding Google Fonts. However if you need any further help with this subject or your marketing goals in general, get in touch with us here at hello@wonderagency.co.uk and we’d be more than happy to help.


